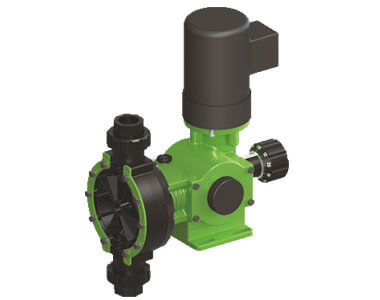
Pulsafeeder by IDEX has been a world leader in chemical dosing and fluid handling technology, successfully building a foundation of installations in fluid applications. Its pumps are known for their long years of service and rugged design, having a sturdy diaphragm seal to prevent any leakage.
Nevertheless, almost all pumps require priming. What is priming, and how can you prime a pulsafeeder diaphragm pump? Read through this article to help you know the value of priming.
What is Priming?
Priming is the act of readying a pump for use. It involves filling the pump’s casing with recommended fluids before starting operation; otherwise, your pump will suffer a malfunction. If you start using your pump when the casing is filled with gas, it will not operate well, making the pump run dry, causing serious damage and mechanical seal failure.
The Procedure for Priming a Pulsafeeder Pump
Before operating your pump, you want to make sure everything is working optimally before operation. You do not want to make a costly mistake that may halt your operation mid-way. Here is a procedure for priming your pump for efficient operation –
- During priming, you could test your pumps with fluids, such as water, sulfuric acid, or polymer. However, before priming, ensure the pump head, diaphragm, and valve seats are removed, dried thoroughly, and then
- Plugin the pump into a power source and turn it on. Some pumps have a green LED that will light up when the power is on and flash off every time the pump strokes.
- Open the bleed valve by turning its knob counter-clockwise to fully open it, thus allowing any liquid or air in the pump to revert to the chemical tank, thus allowing easier priming of the
- Ensure you have adjusted the stroke length and frequency knob to the 100% setting mark when the pump starts stroking. Any adjustments to the stroke length can only be made once the pump is running. These settings will facilitate the fastest priming for your
- You should temporarily bypass the discharge line if it is connected to the pressurized system as you prime the pump. The pulsafeeder pump is furnished with a bleed valve to facilitate the bypass of discharge The bleed valve will help remove all air off the pump’s head to enable the pump to work against pressure.
- When you see a clear stream of liquid in the bypass tubing, turn the bypass valve knob clockwise until it is fully seated. This setting will divert chemicals from the pump’s bypass line to the discharge tubing, thus providing chemicals through the injective valve to the
Note: You should only adjust the feeder when the pump is running and not force the output knobs to turn. Avoid turning the adjustment knobs when the pump is not running.
Air Bleed Operation
The air bleed operation is meant to optimize the pump’s operation since air buildup will hamper its priming. To carry out this operation, follow the procedure below:
- Run the pump with the valve fully opened until you see a stream of liquid ooze from the bypass tubing with no air
- Adjust the screw clockwise to close the air bleed
- If you do not see the fluid through the valve is within a few minutes, disconnect the pump from the source of power. Depressurize it, remove the tubes, and dampen the discharge valve area using a few drops of the liquid you intend to feed the pump. It is safe to use protective gloves when handling chemicals.
- If the problem persists, consult the troubleshooting in the
- Once you have primed your pump and the chemicals are pumped through the head, switch off the power button, reconnect the tubing, and clean the spilled chemicals on the head or pump
- Switch the power on again and adjust the pump’s specifications to your desired rate. However, ensure you check Pulsafeeder pump calibration after
Pulsafeeder Pump Calibration
The Pulsafeeder pump’s actual output is impacted by several application variables. It is vital to calculate the pump adjustment knobs’ settings to provide an estimated output to work within most applications. Pulsafeeder pump calibration column is often used in determining the pump’s exact output.
This way, you will know if the accurate amount of chemical is being discharged. We provide you calibration kits for accurate calibration of these metering and dosing pumps.
Use the following procedure for Pulsafeeder pump calibration –
- Turn the bypass valve counter-clockwise to open while keeping the discharge valve closed fully. Run the solution you intend to feed the pump until the system reaches its optimum pressure. Fill the calibration column to just above zero mark using the bleed return line.
- Now close the bypass valve and open the discharge
- Observe to see the solution reach zero mark in the calibration column and start a stopwatch for 30
- Close the discharge value and open the bypass
- The resulting amount of drawn down fluid is the pump’s current output
It is important to prime your pump before you start running. Priming will allow for the smooth operation of the pump and could make your machine last longer.
Are you interested in learning more about how a Pulsafeeder metering and dosing pump can benefit your business? Contact us today to discuss your requirements.